The Media Library in WordPress is where all your multimedia files, including images, videos, and documents, are stored and managed. Effective photo library management makes it easy to find, organize, and use these files in your posts and pages. In this article, we will show you how to manage your WordPress photo library quickly and effectively.
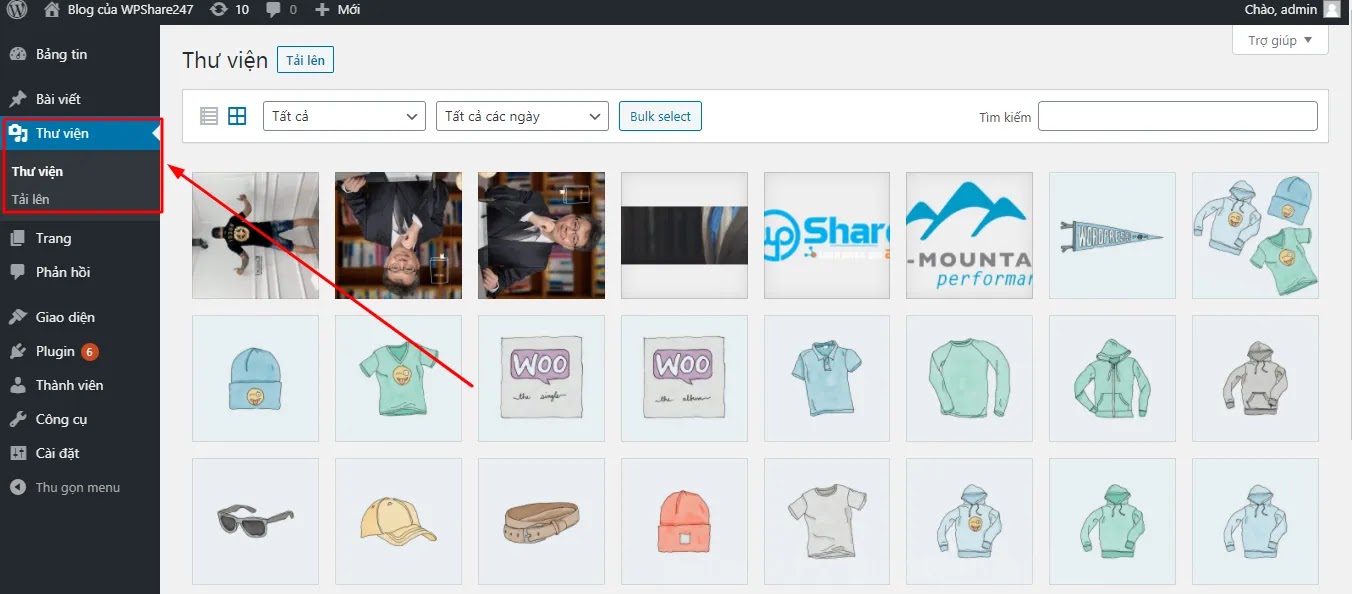
Step 1: Access the Photo Library
To access your WordPress photo gallery, simply follow these simple steps:
- Visit the WordPress dashboard.
- In the left menu, click Media (Library).
- You will see all the media files that have been uploaded to your website, including images, videos, and documents.

Step 2: Upload Photos to Library
To add images or videos to your gallery, you can upload files directly from your computer to WordPress:
How to Upload Photos
- Visit Media -> Add New (Add new).
- Click the button Select file and select an image or video file from your computer.
- WordPress will automatically upload the file and you will see it appear in the gallery.
You can upload multiple files at once by dragging and dropping them into the upload box or clicking the “Select files” button multiple times.
Step 3: Manage Uploaded Images
Once the files have been uploaded, you can manage them by editing or deleting unnecessary files.
Image Editing
- Click any image file in the library to open the detailed editing page.
- Here, you can change the image’s title, alt text, caption, and description.
- You can also resize, crop, rotate, and flip images using WordPress’ built-in image editing tools.
- Click Update after completing editing.
Delete Unnecessary Images
To delete unnecessary images, simply click on the file you want to delete, then select Delete permanently. WordPress will remove the image from the library and all posts using this image will no longer display the image.
Step 4: Organize Your Photo Library Effectively
To organize your photo library neatly, you can use plugins or tools that help organize and manage images. This is especially useful when you have a lot of image files on your site.
Use Plugins To Organize Your Library
Some popular plugins help manage photo libraries more effectively:
- Media Library Assistant: This plugin helps you add advanced features to manage and organize your photo library by categories, tags or keywords.
- FileBird – Media Library Folders: This plugin allows you to create folders and drag and drop images into each folder to organize your library more intuitively.
You can install these plugins directly from your WordPress dashboard and start organizing your photo library more effectively.
Tips for Effective Photo Library Management
- Add alt text to each image: Alt text not only improves SEO, but also helps users have a better experience when accessing your page from devices that support screen reading.
- Keep your library tidy: Delete unnecessary or duplicate image files to save storage space and make the library easier to manage.
- Use recognizable filenames: Name image files clearly and relevant to the content for easy search and management.
- Optimize image size: Compress images before uploading to reduce page load time and save storage space.
Manage photo library
Managing your WordPress image library is an important skill that helps you organize and use images more effectively on your website. By taking advantage of the tools available in WordPress and supporting plugins, you can easily control your photo library, optimize storage space, and improve website performance. Start managing your photo library today to create a cleaner and more professional website!

